Portfolio: Composite and Cedar Deck

This summer I built a number of decks, many with a similar combination of materials as this one – a composite deck (I have used Timbertech extensively) using a hidden fastener system, combined with cedar handrails featuring heavy welded wire fencing. This combination gives a rot proof, no finish, horizontal walking surface along with an attractive and visually transparent railing system.

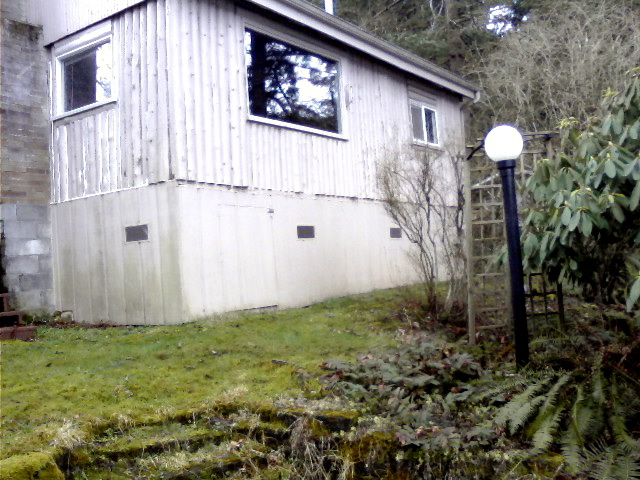
This is the site before construction. The best view to the lake was restricted to a modestly sized picture window. The sliding glass door (out of the photo) was off of a very small side deck with no real view.

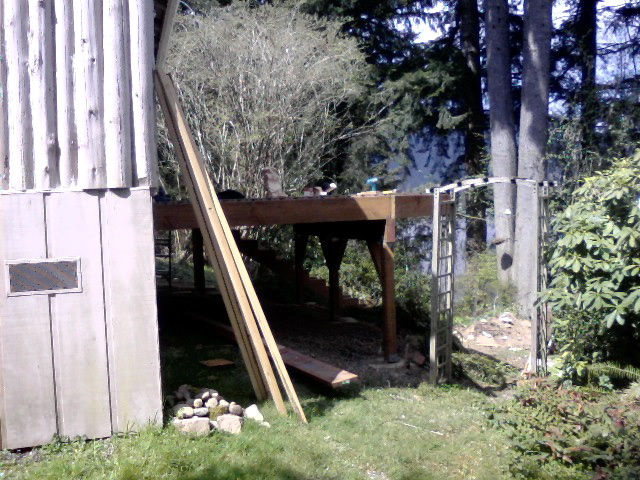
Building the platform was fairly straightforward. The area was cleared of some shrubs, concrete was poured, a ledger was attached to the house, and the platform of treated lumber was cantilevered over a beam. The deck was given a broadly angled front face, the near side of which (shown here) allowed passage of the existing path going through the little arbor.

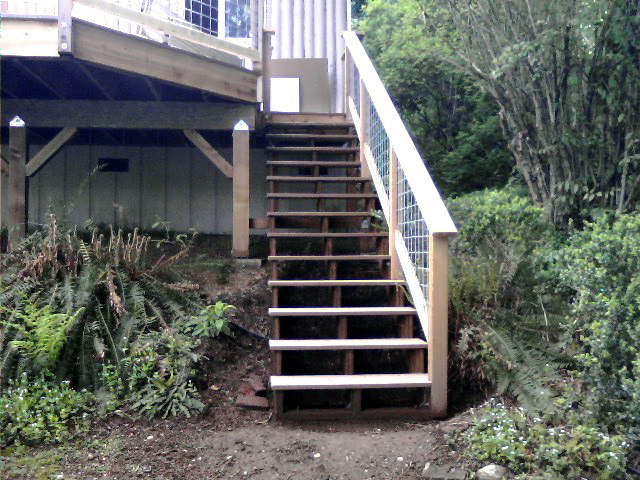
A stairway was created on the other side of the deck that comes down to join the path leading down to the dock. This created a much more direct route between the lake, the new deck, and the house.

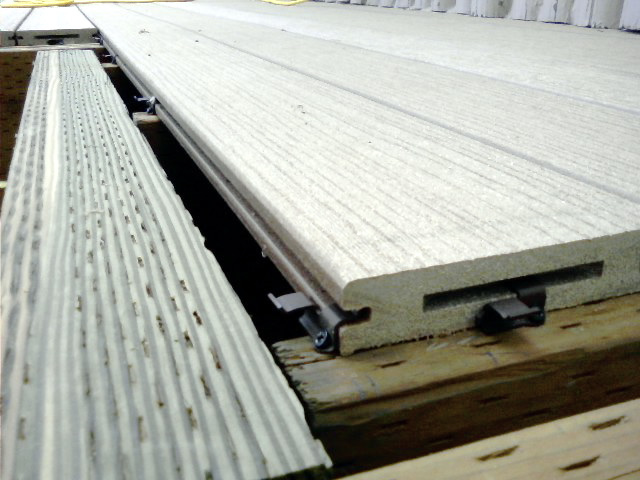
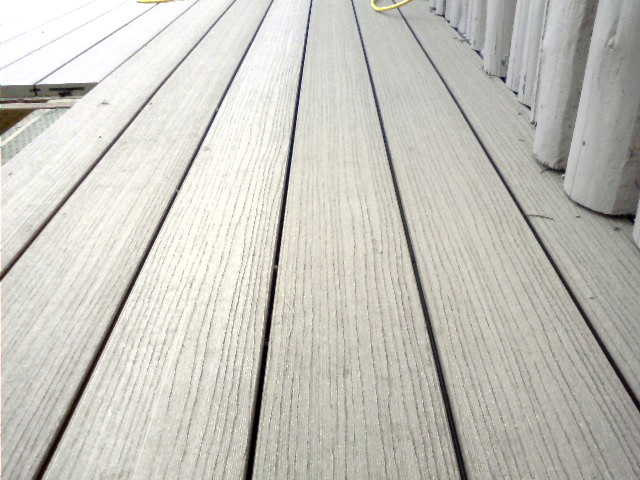
The Timbertech boards come with either grooved or plain edges. The grooved edges are designed to accept these nifty hidden fastener clips. However, they are expensive – this deck required $300 worth of clips. Made of heavily anodized metal and secured with stainless steel screws, they are very corrosion resistant. At places where a clip needs to be set where grooves don’t exist, such as the end of this board, a slot can be easily made with a special router bit. The material cuts very easily.

The hidden fastener system leaves a blemish free surface. The clips automatically space the boards the proper distance. Proper spacing is important because composite materials shrink and swell in the opposite pattern from wood – they grow in the heat, and shrink in the cold because of the high plastic content. The surface never needs finish, will not crack or warp, and is virtually rot proof. You should never be temped to use a power washer on composite materials as they can be easily etched, and the marks cannot be sanded out without destroying the textured pattern.

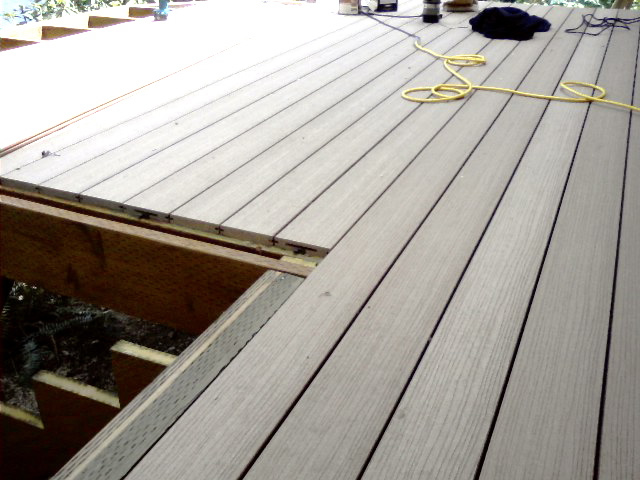
This deck was framed to have a “picture framed” decking arrangement. All the boards are laid in one direction, but a single, ungrooved, board goes around the whole edge, capping off the ends of the main deck boards and hiding their grooves. Here one can see the deck before the picture frame boards have been installed, with clips positioned at regular intervals at the board ends to engage with the picture frame boards. An extra framing member had to be located just back from the edge in places to provide a fastening surface for this transition.

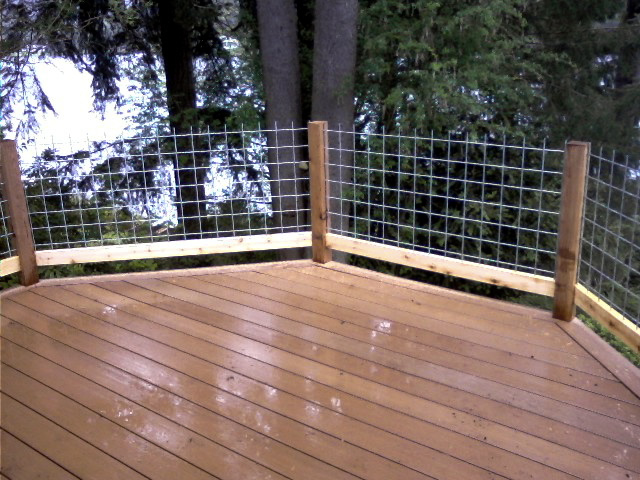
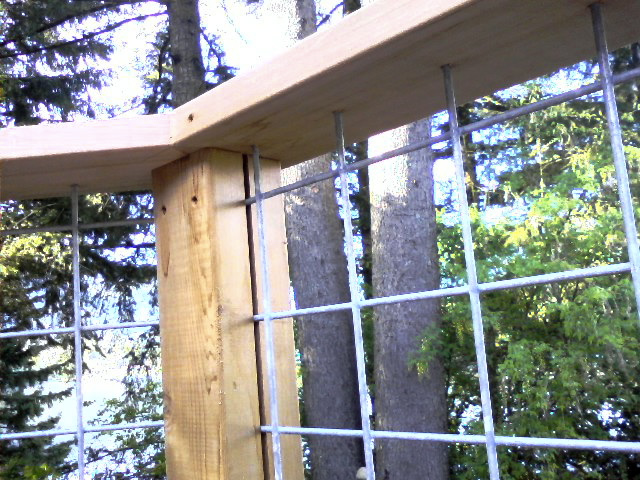
Cutting the welded wire horse fence panels requires careful planning. Close measuring gives the panels equal spacing to the posts on either side. The length of each panel must be precise, but with just enough wiggle room, so the end wires fit down exactly into slots made in the edge of each post. The top wires must protrude a uniform small amount above the height of the posts so that they can engage with the top rails.

Once the panels are slid into place a sharp tap with a hammer on the top of each vertical wire marks the location on the bottom rail. The panel is then removed and a small hole is drilled a precise depth at each mark to ensure that the tops also sit at the required height. The wires then slot neatly into the holes giving a clean finished look with minimal visual obstruction.

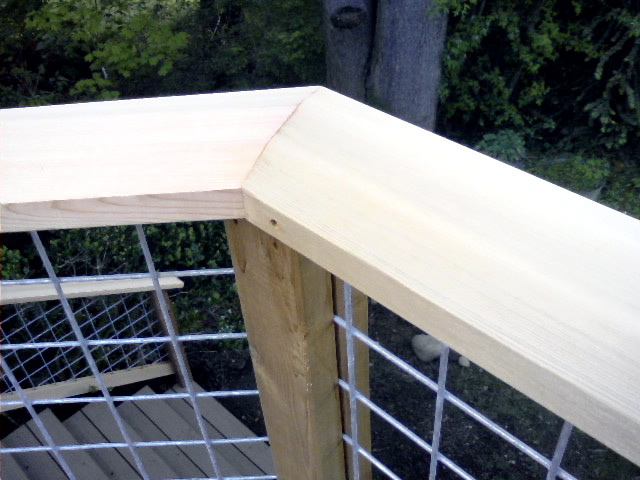
The top rails are cut to fit prior to installing the wire. A layout mark is drawn across the tops of the posts showing the location of the miter joint where two top rails meet. The wire panel is then inserted and a measurement is made from this mark back to the first vertical wire. All the other wires are at regular four-inch intervals. The set of measurements is then transferred to the under side of the top rail and holes are then drilled to accept the wires. The top rail is then gently tapped down onto the wire ends and the miter joint with the adjacent rail is drawn together and fastened.

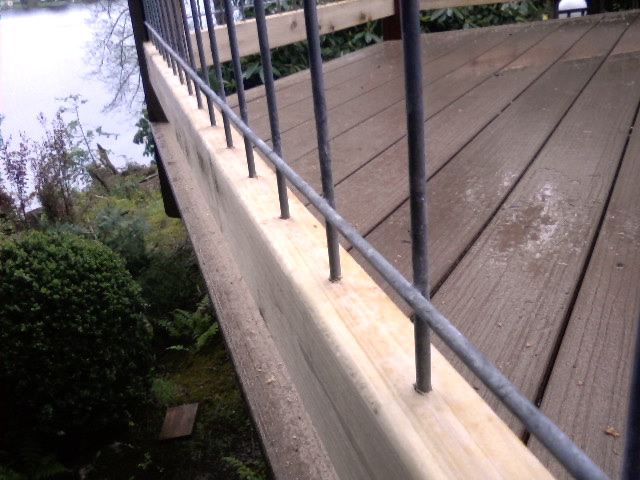
All the rail fasteners are installed from the bottom or sides, leaving the tops free of holes. This helps prevent rot getting started where the weather hits the rails hardest. Ideally, the end grain of each board should be painted with finish during installation to inhibit moisture from wicking into these areas. End grain absorbs moisture far more than surface grain because that is the direction the living tree transported fluids through it’s structure.

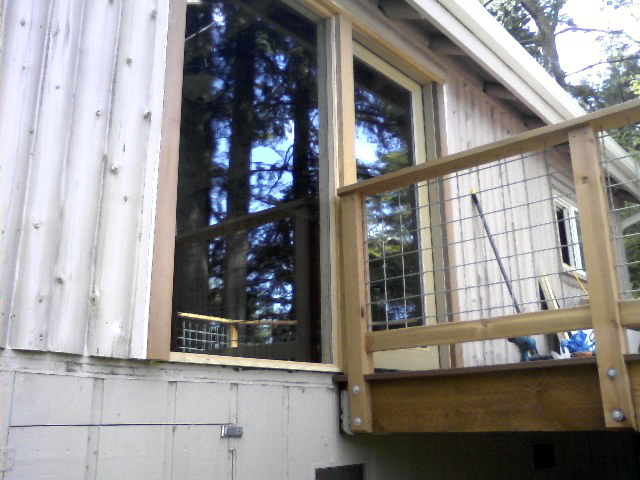
The picture window, and the section of wall beneath it were removed. In it’s place a combination window and door were installed. The deck joins the arrangement in the middle, preserving access to a 4’ tall door just below the window where kayaks are stored under the cabin.

There are practically no eaves protecting this door, so we chose a fiberglass door and composite jambs for a rot proof installation. These materials can be easily stained or painted. All the glass is tempered for safety, as required by code, because it is close to the floor. Now, instead of simply looking out the window, you can step out amongst the trees and have a million dollar view of the lake.